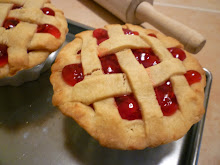
I thought these would make great little take-along pies for Emily's school lunches, that was the plan anyway.I guess I didn't really think it through, because we made them on Friday and the recipe only made five pies, so of course by Monday when I went to pack her lunch they were all gone. Oh well, at least I know they were good! By the way, if anyone knows the name for this type of pie (mini, with the filling enclosed in crust) please tell me. I know that they have a name which is escaping me and it's driving me crazy!
CRUST:
1/3 c plus 1 T Chilled vegetable shortening
1/4 c Rice flour
1/4 c Sorghum flour
1/4 c Potato starch
1/8 c Sweet rice flour
1/8 c Tapioca starch
1 1/2 t Dry Ener-G egg replacer
1/4 t Salt
2 t Sugar
2 to 3 T Ice water
In a large bowl with a wire whisk blend all dry ingredients. Cut in vegetable shortening until particles are the size of small peas (most recipes say to use a pastry cutter or two knives, I actually use my whisk in a potato masher sort of way, alternating between stirring and mashing until the desired consistancy is reached). Sprinkle in water, 1 tablespoon at a time, tossing with fork until all flour is moistened and pastry dough holds together when shaped into a ball with hands (1 to 2 teaspoons additional water can be added if necessary). Flatten into a rectangle and chill dough for at least an hour.
FILLING:
2 c Thinly siced apples (about 2 med. apples)
1/2 c Water
1 T Lemon juice
2 T Brown sugar
1/2 t Cinnamon
1 or 2 dashes of Nutmeg
Stir all the ingredients together in a medium saucepan. Bring to a boil. Reduce heat to medium and cook, stirring occasionally, until the apples are tender-crisp and the liquid has reduced to a syrupy coating. let the apples cool before handling them.
ASSEMBLY:
I guess I should have taken pictures, but I think it's pretty easy to understand. Take the dough out and allow it to rest at room temperature for a few minutes. Roll it into a rectangle 40"x 20", using sweet rice flour for dusting if necessary. Cut into 10 rectangles, each 4"x 2".
Line a baking pan with parchment paper.
For each pie, lay one rectangle on the parchment paper. Then lay a mound of apple filling down the center, leaving acout 1/4" of crust open around the entire perimeter. Lay another rectangle of crust on top, lining up the edges, stretching a little if needed. If dough tears, it can be mended with a little pinching (if it won't stick, wet your fingers with a little water). Crimp all around the outside edges with a fork or crimping tool. Try to keep the thickness of the crimped edges about the same as the original thickness of the crust, in other words, around the edges the two layers should now be pressed to the same thickness as one layer would be. If you make it too thin the edges will burn.
TOPPING: (optional)
Brush tops of pies with a very thin mix of powdered sugar and water. Sprinkle lightly with cinnamon sugar.
BAKE:
Preheat oven to 350. Cut slits or designs into the top of each pie. Bake approximately 50 minutes. I checked mine at 45 minutes and they were not done. I cooked them for 60 minutes and they were a little crunchier than I would have liked. So, I'm thinking 50 minutes is a good time, but I haven't tried it yet. When I get around to making these again I will come back and revise this part.
Well, there you have it. Happy Snacking!