Showing posts with label breakfast. Show all posts

Tuesday, April 16, 2013

Super Good, Gluten Free, Vegan Pancakes! (aka Pancakes for Syrup)

I have tried a lot of pancake recipes. Some of them I invented, some of them I borrowed, none of them spectacular...until now. I found this pancake recipe at Cinnamon Quill and the author was kind enough to allow me to re-post it. These are hands down the best gluten free vegan pancakes I have ever had! I had to play with my measurements a little, and my pictures aren't nearly as beautiful as hers, but both of my girls LOVE them hot off the griddle, or microwaved from a frozen state. I added some personal notes into the recipe as to what changes I made. Also, if you check out Cinnamon Quill's original recipe, she includes some helpful troubleshooting tips of her own. Enjoy! :)


PANCAKES:
1 1/4 c Non-dairy milk
1 t Cider vinegar
1 Eggs worth of Ener-G Egg Replacer
1/4 c Canola or safflower oil
2 t Vanilla extract
Oil for pan
1/2 c Rice flour
1/2 c Millet flour
3/4 c Tapioca flour
1/4 c Brown sugar
3/4 t Xanthan gum
1 t Baking powder
3/4 t Baking soda
Tiny pinch salt
Up to ¾ c of water (reserved)
In a medium mixing bowl, stir together wet ingredients. Whisk in dry ingredients, making sure there are no big lumps of flour. At this point, look at the thickness of your batter, it should be only slightly thicker than standard pancake batter. If needed, mix in a little water at a time, until desired consistency is reached. I added the full ¾ of a cup of water, but I think it is because I used soy milk (the thickest of the alternative milks), and white rice flour instead of brown rice flour.
Preheat skillet or griddle; brush with a very light layer of oil or cooking spray. Let batter stand 3-5 minutes, if it thickens too much you can still add more water. Keep in mind that thinner batter equals thinner pancakes.

Using a ladle or ice cream scoop, pour batter by the scant 1/4 cup onto the hot pan. Cook until edges look set and there are little bubbles on the surface of the cake. Flip and cook 30-60 seconds more, until bottom is golden. If you are using a non-stick skillet, you may need to lower the heat quite a bit.

Halfway through, you may need to refresh the oil on the pan, depending what kind of pan you are using.

Because they are thick, these pancakes may take a bit longer to cook, be patient, and do a test pancake to determine exact cooking time.

Makes about 18-20 5″ pancakes.

Friday, July 1, 2011

Lemon Poppy Seed Muffins-Gluten Free, Dairy Free, and Egg Free

Well, we have probably all noticed that I don't seem to have time to create new recipes anymore, but I do find myself drawing on other great bloggers recipes from time to time. My daughter was craving lemon poppy seed muffins recently and in searching for a gluten free version I discovered Nicole at Gluten Free On A Shoestring, and I am so glad I did! Here is the link to her recipe for GF muffins (which do contain dairy and eggs) http://glutenfreeonashoestring.com/lemon-poppyseed-muffin-love . Nicole uses a flour blend called Better Batter which I am planning to try in the near future. I didn't have any flour blends on hand so I used one of my usual combos, but there are so many blends out there right now, and you can certainly substitute 2 cups of your favorite blend for the first 5 ingredients in my recipe (also leave out the xanthan gum if your blend already contains it). These muffins are incredible, even without eggs and dairy!

½ c Rice flour
½ c Sorghum flour
½ c Millet flour
¼ c Tapioca starch
¼ c Potato starch
1 t Xanthan gum
1 t Baking powder
1/2 t Baking soda
¼ t Salt
Zest of 1 lemon
2 T Poppy seeds
½ c Dairy free margarine
¾ c Sugar
2 Eggs worth of egg replacer
1 c Soy yogurt (I used half lemon and half vanilla)
½ t Vanilla extract
Juice of 1 lemon

Line 12 muffin cups with paper liners. Preheat the oven to 350 degrees.

In a medium sized bowl, place the flours, xanthan gum, baking powder, baking soda, salt, lemon zest and poppy seeds, and mix to combine. These are the dry ingredients. You want the lemon zest and poppy seeds to be coated in dry ingredients so they don’t clump together in the batter. Set the bowl aside.

In a large bowl, cream together the margarine and sugar until fluffy and light in color. Add the egg replacer, soy yogurt, vanilla extract, and lemon juice, beating well to combine after each addition. Add the dry ingredients to the wet mixture, and beat well until the batter becomes thicker and a bit more elastic.

Divide the batter evenly among the 12 cups of the muffin tin. Place the muffin tin in the center of the preheated oven, and bake for 25 minutes, or until a toothpick inserted into the center of a muffin comes out clean.

We also drizzled a little icing over ours, made from powdered sugar and lemon juice.
Enjoy!

Monday, August 30, 2010

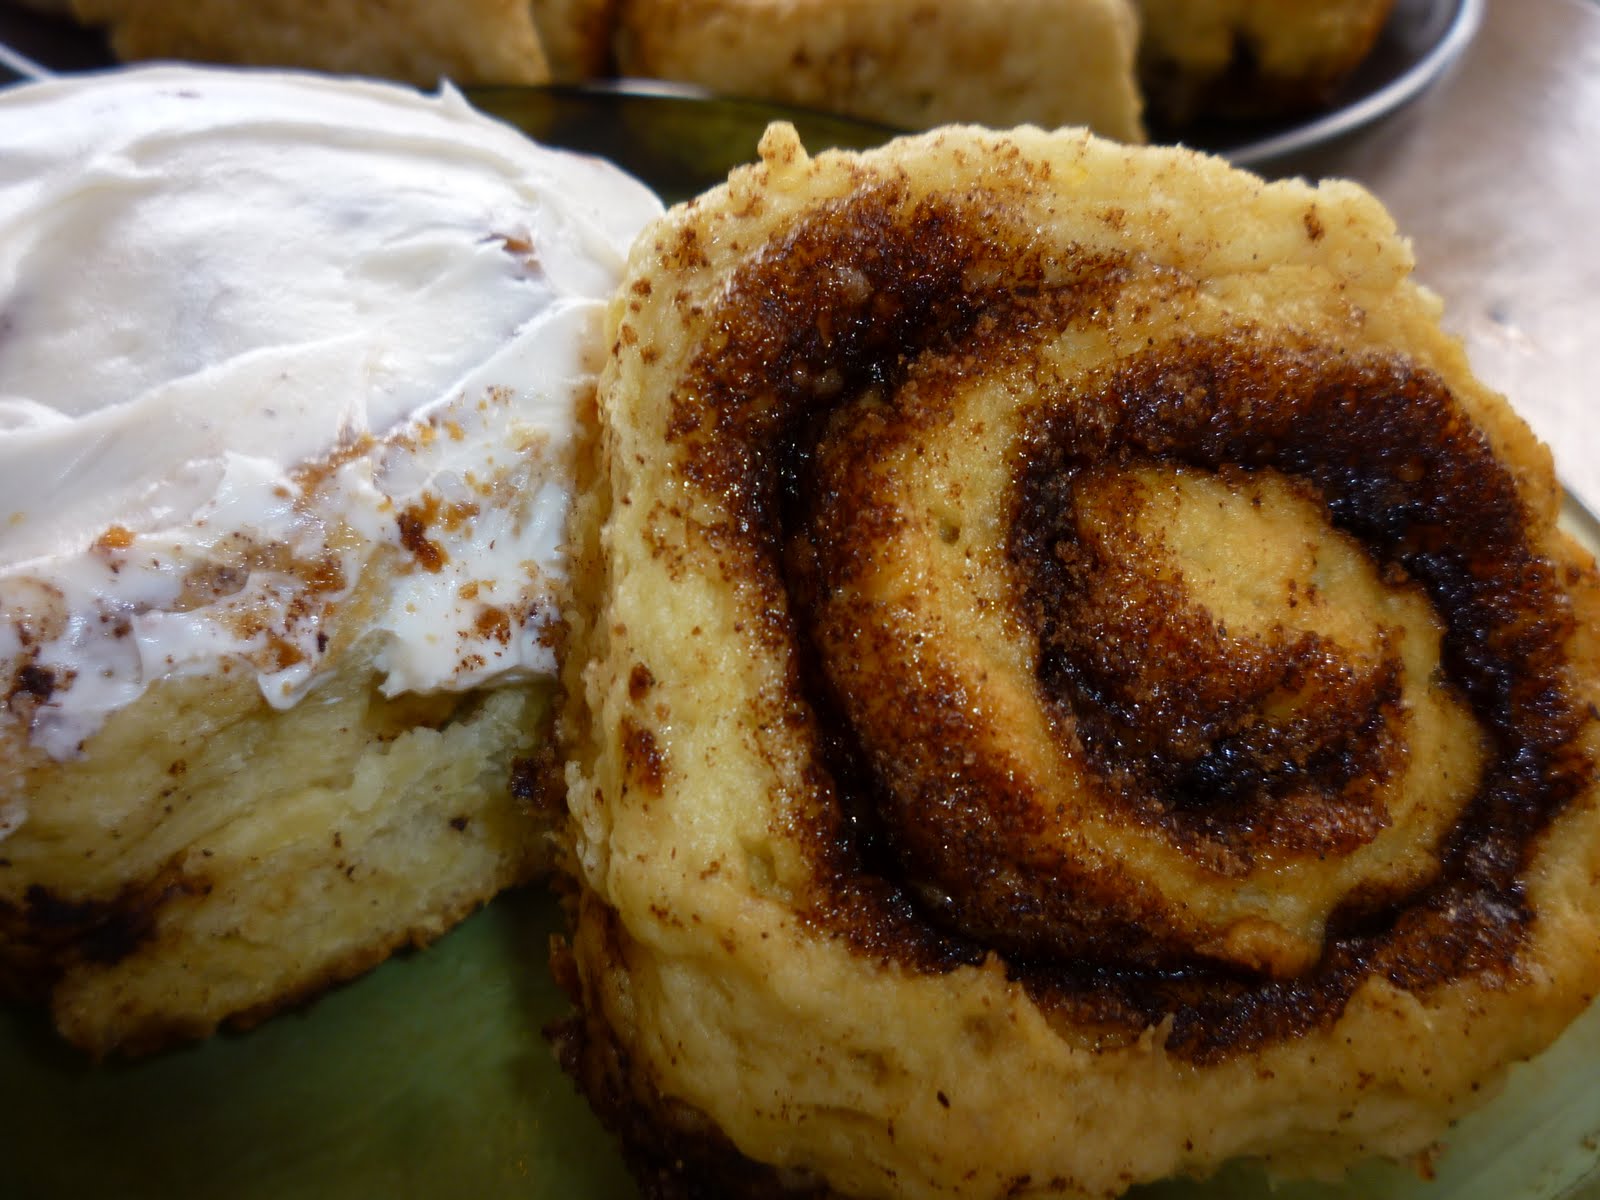
Gluten Free Cinnamon Rolls

Cinnamon rolls! What more can I say? These are gluten free, egg free, and dairy free, but if you are able to have egg and/or dairy you can substitute one egg for the egg-replacer and/or 2/3 c. skim milk for the dairy alternative and the water and you will end up with an even lighter and fluffier version. Those of you who are used to going without all three (as are we) are still going to fall in love with these! Plan to make them on a day when you have some free time as they are time consuming and a bit messy to make, but they are worth it. The last batch of 8 that I made in the evening was gone by morning. Two last notes before we get started...1: This dough is sticky and soft, it is not easy to roll, remember that no matter what your "rolls" look like they will still taste great! 2: You can frost these with any icing or frosting that you like. My favorite homemade dairy free butter cream frosting recipe can be found here. We used Pillsbury Creamy Supreme Cream Cheese frosting which, oddly enough, contains no dairy. (I know that's kind of scary, huh? It was good though.)

DOUGH:
1/3 c Warm water
1/3 c Soy milk
1 T Yeast
¼ c Potato starch
¾ c Corn starch (or arrowroot starch)
½ c Millet flour
¼ t Baking soda
2 t Baking powder
½ t Salt
2 ½ t Xanthan gum
2 T Melted palm shortening or dairy free margarine
¼ c Granulated sugar
1 Eggs worth of egg-replacer
¼ c Oil
1 t Vanilla extract

FILLING:
¼ c Softened dairy free margarine
1 T cinnamon
½ c Brown sugar

Pour warm water and milk (about 110 to 115 degrees into a large mixing bowl. If you would like to use a thinner milk alternative such as rice or almond, omit the water and just use 2/3 c. milk. Add the yeast and allow it to foam for about 5 minutes.

While the yeast is proofing, combine in another bowl potato starch, corn (or other) starch, millet flour, baking soda, baking powder, salt, and xanthan gum. Whisk or sift together.

To the warm water, milk alternative, and yeast mixture add 2 T. melted shortening or margarine, granulated sugar, egg-replacer, oil, and vanilla. Stir until combined. Add the dry ingredients and mix on low until they are incorporated, then mix for another minute on medium. Place the dough in an oiled bowl (I use the now empty dry ingredients bowl to save dishes). Cover with an oiled piece of plastic wrap and put it in a warm place to rise for about 45 minutes.

Lay out a large piece of parchment paper and sprinkle it with corn starch. Spread out the dough into as much of a square as you can. Sprinkle some more corn starch over the dough and lay another piece of parchment paper on top. Roll the dough into a 13" x 13" square. Remove top sheet of parchment paper. Spread the softened margarine over the dough leaving 1" at the top edge clean to help it stick when rolling. Combine the brown sugar and cinnamon in a small bowl and sprinkle it evenly over the entire surface of margarine. Begin to roll, from the bottom up, as tightly as you can. The nature of gluten free cinnamon rolls is to roll more loosely than a stiffer standard dough. Lift the bottom layer of parchment paper as you roll to help it along and maintain shape. Your roll may collapse and look more oval than round, it is OK. Pinch the clean 1" edge into the roll to seal.

Grease a medium sized baking pan. Using a sharp knife, slice the rolls into 8 even pieces. If you dip the knife into corn starch between each slice it will prevent sticking. Place the slices into the greased pan. Cover with oiled plastic wrap and allow to rise again in a warm place until the sides of the cinnamon rolls are touching.

Preheat oven to 400 degrees while the rolls are rising. Bake for approximately 20 minutes, or until they are lightly golden on top. Cool slightly then remove from the pan.
If you want a thin icing you can pour it over while they are still warm. If you prefer a thick frosting, wait until they are fully cooled.

Wednesday, July 21, 2010

Gluten Free Vegan Banana Waffles

Yes, I finally have a new recipe! OK, so maybe the initial idea wasn't mine. I was inspired by Food Allergy Mama's vegan banana chocolate chip waffle recipe. I was browsing her recipes and my middle daughter saw these and got very excited, then I had to tell her they were made with wheat flour. She is newly diagnosed with wheat allergies (possible celiac) and it has been a VERY difficult adjustment for her. She still cheats sometimes and then feels lousy for days! I am, therefore, trying to come up with truly amazing new recipes for her so that she won't feel so deprived...this is one of those recipes. These waffles really are wonderful. Not only do they taste delicious, but the texture is very wheat-like. I made the fist batch using Enjoy Life chocolate chips, but they stuck to my waffle iron very badly. I tried the next batch without chocolate chips and the problem was solved. These are our new favorite breakfast food. Thank you Kelly!

1 c Rice flour
½ c Millet flour
½ c Sorghum flour
½ c Corn starch (use tapioca starch if allergic to corn)
2 T Sugar
1 T Baking powder
¼ t Salt
1 2/3 c Vanilla soy milk
6 T Oil
2 T Water
1 c Mashed ripe bananas

Preheat waffle iron.
Combine flours, starch, sugar, baking powder, and salt using a wire whisk. In a separate bowl whisk together soy milk, oil, water and banana. Add the liquid ingredients to the dry ingredients and stir until just combined.
Ladle about a 1/2 c. batter on hot iron that has been sprayed with dairy free baking spray. Cook until steam is no longer escaping from the waffle iron. For standard waffles my iron says it should take 5 or 6 minutes, my waffles took 10 to 12 minutes, so I would say try doubling your waffle irons recommended time. Watching for them to stop steaming is really the best way to tell.

Monday, March 30, 2009

Egg, Dairy, and Gluten Free French Toast

This is one of the recipes I lost when my hard drive died, but I think I've got it pretty close to the original. My pictures may be blurry and amateur for a while, my oldest daughter lost her camera and I am taking my own pictures again. This recipe does not need to be gluten free. You can use any kind of bread, although a sturdy bread works best. I will first post the recipe for flax egg replacer because it can also be used in other recipes. It is good for binding and moisture retention, but does not help with rising.

Flax Egg Replacer:

Bring 1/2 c of water and 1 T of flax seed to a boil. Reduce heat and simmer for 5 minutes. There are a few ways to do this. If you don't mind the seeds you can use whole seeds and just leave them in. If you don't want the seeds in you can strain them out, but it is a little bit of work. I opted for the third choice which is to grind the seeds first and leave them in so they are just not as noticeable.

French Toast:

1/2 c Water and 1 T Flax seed as prepared above
2 Eggs worth of prepared Ener-G egg replacer
1/4 c Soy milk
1/2 t Vanilla extract
1 t Cinnamon
About 3 slices of bread-We use Pamela's Wheat Free Bread Mix bread

Preheat a well oiled frying pan to medium-high.
Whisk soy milk and Ener-G egg replacer into flax seed egg replacer. Mix in the vanilla and cinnamon.
You are now looking at a pretty thick goo. Instead of simply dipping your bread in the mixture like you normally would this will require more of a spreading action. I laid my bread into the mixture and flipped it over, then used my hands to spread it around and sort of massage it in. Yes, this is messy, but if your in the right mood it's kind of fun. Wipe off any excess glops.
Place in the frying pan and cook for approximately 3 minutes on each side. If your toast is browning too quickly turn the heat down. Oil pan before each new piece.
This only makes 2 or 3 pieces, so if you are making more simply double the recipe.

Sunday, March 22, 2009

Allergen Free In-A-Pinch Pancakes

Ughhh! I ran out of my
"Cravings Place" pancake mix, and here it is Sunday morning...
we have to have pancakes! This is the recipe I threw together. It's possible that it could be improved upon, but for now Emily is plenty pleased with this recipe.
I do apologize for the lack of recipes here lately. Somehow, when I lost all of my recipe files on my computer (even though I have most of them here too) it felt like I lost a little piece of me, and a little confidence too. It is a very difficult feeling to describe, but I feel almost like I have forgotten how to bake allergen free.
At any rate, I'm ready to start again. Here is our pancake recipe. Next I am going to try to remember my french toast recipe...I can do this. Right?

1/4 c Tapioca starch
1/4 c Potato starch
1 c Rice flour
1/2 c Sorghum flour
4 t Baking powder
2 T Granulated sugar
1 1/2 c Water
2 t Vinegar
2 t Vanilla extract
2 T Oil (safe for your allergies)
2 T Applesauce

Preheat griddle to medium-high heat.
Combine all of the dry ingredients and sift or whisk together until well blended.
In a separate container whisk together all of the wet ingredients (everything remaining).
Add the wet ingredients to the dry ingredients and stir until fully combined and smooth.
Oil your griddle with margarine or oil safe for your allergies. Pour slightly less than 1/4 cup of batter onto griddle and cook for a couple of minutes. It's time to flip when: bubbles stay open after they pop, edges look dry, and you can see a slight golden color on the bottom of the edges where they meet the griddle. Flip pancakes and cook for another minute or two. Adjust heat if necessary. My griddle usually gets hotter the longer it is on, so I start out at medium-high, and by the last pancake I am at medium.
I served these with very naughty nitrate filled bacon, it's just sooo yummy.
Thank you all for sticking with me through my recent struggles, hopefully I will get back in the swing of things soon!