Showing posts with label recipes. Show all posts

Monday, March 3, 2014

Ice Cream Cake (Gluten Free, Dairy Free, Egg Free)

It would appear that my blogging days are coming to an end, and it has occurred to me that every time I open up my blog (and possibly forever more, when anyone finds themselves here) the last thing that I posted will be here waiting to represent my entire blog. The last thing I posted was a review. Don't get me wrong, it was a good review, but not exactly the farewell post that I had dreamed of. I started YummyAllergenFree in 2008 right after my youngest daughter's 6th birthday. I was testing cake after cake recipe in search of the perfect allergen free birthday cake, and was starting to realize that I thrived on the challenge. Once I started the blog, and started interacting with all of my readers, I knew that I had found my passion. In 2010 I finally came up with an allergen free cake that I was happy with. Another of our favorites was a giant crispy rice treat made into a cake, but I guess I didn't post that one. Well, here we are at birthday number 12. I feel good about bringing this full circle and wrapping it all up with a birthday cake, and I expect that this year's incredible ice cream cake will be a welcome greeting every time I return here looking for archived recipes (yes, I still do that, and I hope you will too).  I can't thank you all enough for joining me on this journey, you have touched and enriched my life so very, very much! Okay, enough with the tears...here's to the inspiration for it all...Happy Birthday Emily!!!

Ice Cream Cake: (this is going to be rambling...I mean instructions... more than a recipe)

      Prepare one package of Pamela's Chocolate Brownie Mix (available to the right in my "Amazon Favorites") as directed on the side panel for eggless chocolate cake. A note here: *Pamela's does have possible cross contamination warnings, so please read the package carefully, and/or call the company, before deciding if it is right for you. Bake in two 8" round cake pans. Put in the freezer to cool.

     While the cake is cooling, soften one pint of dairy free ice cream of your choice. This time around I used Double Rainbow mint chip soy ice cream, which I had never heard of before, but it was the only mint chip I could find, and it was really good. *Double rainbow also carries cross contamination warnings. When the ice cream was soft, but not melted, we mixed a few drops of green food coloring so it would look more like traditional mint chip ice cream. If you really want to get crazy and make your own ice cream, speedbumpkitchen's ice cream shoppe is one of my favorite resources.

     Lay one cake round on your platter. If you are going to be decorating it and want you platter to be clean, lay strips of waxed paper just under the edges of the cake. The frosting will get on the paper instead of the plate, and then the paper strips can be slid out and thrown away when you are finished. Make sure ice cream is soft but stiff. refreeze a little if necessary. Spread the ice cream on the cake, spreading evenly, and all the way to the edges. Place the other cake round on top of that and press down just a bit. Use an icing spatula or a butter knife to smooth the ice cream around the edges of the cake and give you nice flat sides. Pop the cake back in the freezer for about an hour.

     We frosted our cake with Betty Crocker's whipped white frosting, then decorated it using  my buttercream frosting recipe. Thank you to my daughter Amanda for the beautiful decorating job! In order to keep the colors true, we doubled the amount of palm shortening in the recipe and omitted the margarine.
     That's it, put it back in the freezer until ready to serve. I was a lot easier than I thought it would be, and it was really, really good!!!

One last thing...please know that although I may not be posting new recipes (or maybe I will, who knows what the future holds), I will continue to respond to all questions and comments left on all posts, current or ancient. I would still love to hear from you! :)


Friday, March 29, 2013

Egg-Free Easter Eggs! (Egg Free, Dairy Free, Gluten Free Crispy Rice Treats)

OK, so they're a little lumpy...it's a work in progress. Emily saw the commercial for Easter themed rice crispy treats and had this great idea. Every year we debate weather to dye eggs in this house, since half the family is allergic to eggs.The fun, however, is not in eating them but in decorating them. Since we can touch the shells without incident, we usually dye eggs and then Daddy has to eat them all. "Well", Emily said, "why don't we make rice crispy eggs and cover them in white icing so they look like real eggs, then we can decorate them!" We had so much fun!!! I think we all agreed it was even more fun than decorating real eggs. Just be sure to use edible substances for decorating. We used colored icing (just powdered sugar, water, and food color), candy sprinkles, and Paas Color Snaps which look like Q tips (kind of a rip off though, as 1 package was only enough to color about 4 eggs).

MARSHMALLOW CRISPY TREATS:
3 T Dairy free margarine
6 c Mini marshmallows
2 Dozen hollow plastic Easter eggs (optional)

Wash and dry the plastic eggs before you start. Use margarine or oil to grease the insides of the eggs.
Melt margarine in a large pot over low heat. Add marshmallows and continually stir until they are completely melted and smooth. Remove from heat and add cereal. Mix until cereal is fully coated.
Using greased hands, take a plastic egg and pack as much cereal mixture as you can into each side. Close the egg until it is snapped shut and continue to hold it firmly closed for a few seconds, until you can let go without it popping open. Move on to the next egg. This is a great family project, the more hands involved, the faster it will go. (optionally, you can simply form the eggs by hand, but I didn't seem to possess the skill required for this) While your eggs set up, prepare the icing.

SUGAR ICING (dries fairly hard):
6 c Sifted powdered sugar
6 T Water
1/4 c Corn syrup

Mix powdered sugar and water until smooth. Stir in corn syrup. Scrape down sides of bowl as needed until all ingredients are fully incorporated. Lay out a wire cooling rack with foil or plastic wrap underneath to minimize the mess. Remove crispy treats from plastic eggs and dip them one at a time into the icing. Coat each egg fully, shake off excess icing, then place it on the wire rack to dry. They will take 5 hours or more to harden completely. Now decorate your "eggs". Have fun and HAPPY EASTER!!!

Tuesday, October 16, 2012

Vegan Black Bean Chili

The leaves are changing color, the weather is damp and dreary...it feels like time for a warm bowl of chili! My chili (as with most of my recipes) is child friendly. That is to say that, although it has onions and tomatoes in it, they are blended in so the kids can't pick them out and say "I don't like these". This chili is vegan, although, as you can see here, we sprinkled a little cheese on it for Nikki who does do dairy. A wonderful vegan cheese alternative, however, is Daiya Cheddar Shreds. My mother has become obsessed with this stuff, It's really good! Unfortunately, Emily fell in love with Vegan Rella a long time ago (which as far as I can tell has gone out of business), and she has never liked any cheese alternative since. We paired our chili with a delicious sweet cornbread. The base recipe can be found here with Karina The Gluten Free Goddess. We, however, left out the green chilies and drizzled a little honey over the top before baking for a sweeter version. It's also really good with gluten free tortilla chips. Yum!

VEGAN BLACK BEAN CHILI

1  Can of allergy safe vegetable broth
1  Can (14.5 oz) stewed tomatoes and juice
2  Bay leaves
3/4 t  Cumin
1 1/2 t  Chili powder (more if you like it spicy)
1/2  Chopped yellow onion
2  Cloves of garlic
3  Cans of black beans, drained
Salt and Pepper to taste

Put all of the ingredients except for black beans in a large pot and simmer for half an hour. Remove bay leaves. Combine this mixture with 1/2 a can of black beans in a blender and blend well. Pour back into the pot. Add remaining 2 1/2 cans of black beans and simmer for another hour or so, stirring frequently, until liquid is reduced to desired consistency. If your chili gets too thick you can simply stir in a little water, about 1/4 cup at a time, until it looks good again. Super simple...super delicious!!! Enjoy!

Monday, August 30, 2010

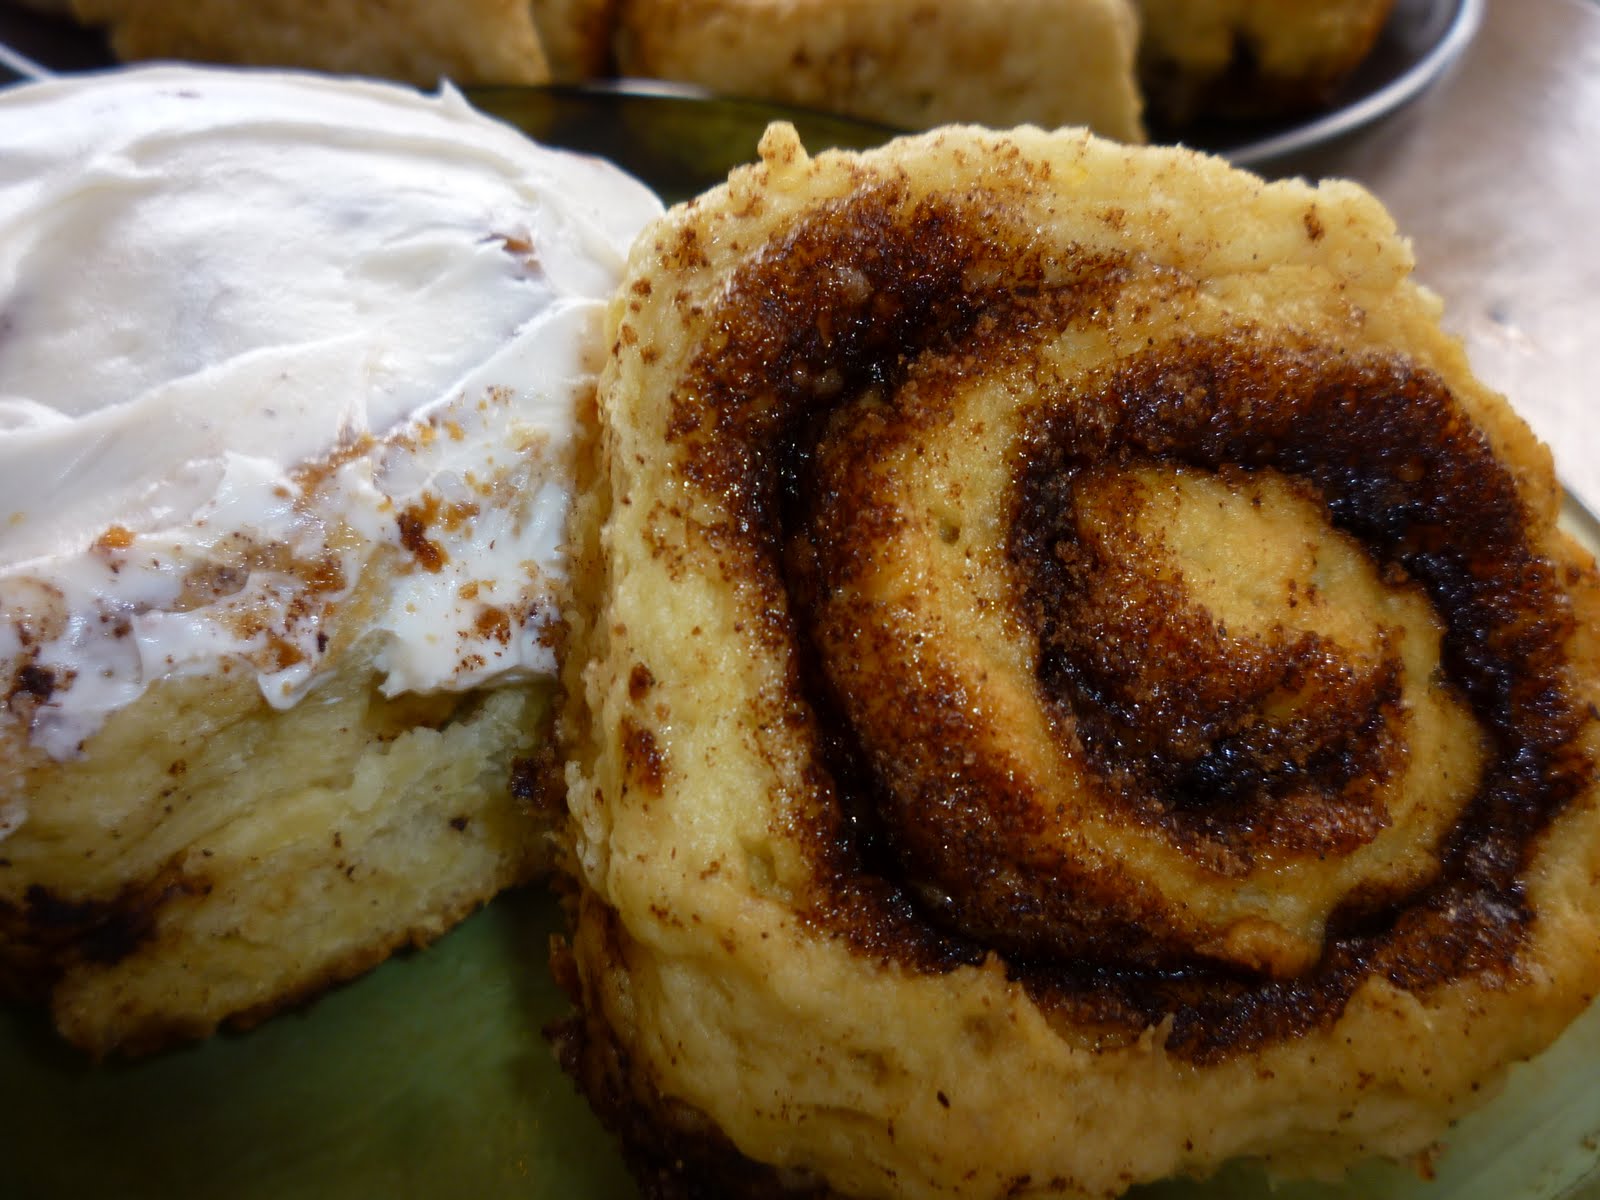
Gluten Free Cinnamon Rolls

Cinnamon rolls! What more can I say? These are gluten free, egg free, and dairy free, but if you are able to have egg and/or dairy you can substitute one egg for the egg-replacer and/or 2/3 c. skim milk for the dairy alternative and the water and you will end up with an even lighter and fluffier version. Those of you who are used to going without all three (as are we) are still going to fall in love with these! Plan to make them on a day when you have some free time as they are time consuming and a bit messy to make, but they are worth it. The last batch of 8 that I made in the evening was gone by morning. Two last notes before we get started...1: This dough is sticky and soft, it is not easy to roll, remember that no matter what your "rolls" look like they will still taste great! 2: You can frost these with any icing or frosting that you like. My favorite homemade dairy free butter cream frosting recipe can be found here. We used Pillsbury Creamy Supreme Cream Cheese frosting which, oddly enough, contains no dairy. (I know that's kind of scary, huh? It was good though.)

DOUGH:
1/3 c Warm water
1/3 c Soy milk
1 T Yeast
¼ c Potato starch
¾ c Corn starch (or arrowroot starch)
½ c Millet flour
¼ t Baking soda
2 t Baking powder
½ t Salt
2 ½ t Xanthan gum
2 T Melted palm shortening or dairy free margarine
¼ c Granulated sugar
1 Eggs worth of egg-replacer
¼ c Oil
1 t Vanilla extract

FILLING:
¼ c Softened dairy free margarine
1 T cinnamon
½ c Brown sugar

Pour warm water and milk (about 110 to 115 degrees into a large mixing bowl. If you would like to use a thinner milk alternative such as rice or almond, omit the water and just use 2/3 c. milk. Add the yeast and allow it to foam for about 5 minutes.

While the yeast is proofing, combine in another bowl potato starch, corn (or other) starch, millet flour, baking soda, baking powder, salt, and xanthan gum. Whisk or sift together.

To the warm water, milk alternative, and yeast mixture add 2 T. melted shortening or margarine, granulated sugar, egg-replacer, oil, and vanilla. Stir until combined. Add the dry ingredients and mix on low until they are incorporated, then mix for another minute on medium. Place the dough in an oiled bowl (I use the now empty dry ingredients bowl to save dishes). Cover with an oiled piece of plastic wrap and put it in a warm place to rise for about 45 minutes.

Lay out a large piece of parchment paper and sprinkle it with corn starch. Spread out the dough into as much of a square as you can. Sprinkle some more corn starch over the dough and lay another piece of parchment paper on top. Roll the dough into a 13" x 13" square. Remove top sheet of parchment paper. Spread the softened margarine over the dough leaving 1" at the top edge clean to help it stick when rolling. Combine the brown sugar and cinnamon in a small bowl and sprinkle it evenly over the entire surface of margarine. Begin to roll, from the bottom up, as tightly as you can. The nature of gluten free cinnamon rolls is to roll more loosely than a stiffer standard dough. Lift the bottom layer of parchment paper as you roll to help it along and maintain shape. Your roll may collapse and look more oval than round, it is OK. Pinch the clean 1" edge into the roll to seal.

Grease a medium sized baking pan. Using a sharp knife, slice the rolls into 8 even pieces. If you dip the knife into corn starch between each slice it will prevent sticking. Place the slices into the greased pan. Cover with oiled plastic wrap and allow to rise again in a warm place until the sides of the cinnamon rolls are touching.

Preheat oven to 400 degrees while the rolls are rising. Bake for approximately 20 minutes, or until they are lightly golden on top. Cool slightly then remove from the pan.
If you want a thin icing you can pour it over while they are still warm. If you prefer a thick frosting, wait until they are fully cooled.

Wednesday, July 21, 2010

Gluten Free Vegan Banana Waffles

Yes, I finally have a new recipe! OK, so maybe the initial idea wasn't mine. I was inspired by Food Allergy Mama's vegan banana chocolate chip waffle recipe. I was browsing her recipes and my middle daughter saw these and got very excited, then I had to tell her they were made with wheat flour. She is newly diagnosed with wheat allergies (possible celiac) and it has been a VERY difficult adjustment for her. She still cheats sometimes and then feels lousy for days! I am, therefore, trying to come up with truly amazing new recipes for her so that she won't feel so deprived...this is one of those recipes. These waffles really are wonderful. Not only do they taste delicious, but the texture is very wheat-like. I made the fist batch using Enjoy Life chocolate chips, but they stuck to my waffle iron very badly. I tried the next batch without chocolate chips and the problem was solved. These are our new favorite breakfast food. Thank you Kelly!

1 c Rice flour
½ c Millet flour
½ c Sorghum flour
½ c Corn starch (use tapioca starch if allergic to corn)
2 T Sugar
1 T Baking powder
¼ t Salt
1 2/3 c Vanilla soy milk
6 T Oil
2 T Water
1 c Mashed ripe bananas

Preheat waffle iron.
Combine flours, starch, sugar, baking powder, and salt using a wire whisk. In a separate bowl whisk together soy milk, oil, water and banana. Add the liquid ingredients to the dry ingredients and stir until just combined.
Ladle about a 1/2 c. batter on hot iron that has been sprayed with dairy free baking spray. Cook until steam is no longer escaping from the waffle iron. For standard waffles my iron says it should take 5 or 6 minutes, my waffles took 10 to 12 minutes, so I would say try doubling your waffle irons recommended time. Watching for them to stop steaming is really the best way to tell.

Saturday, April 10, 2010

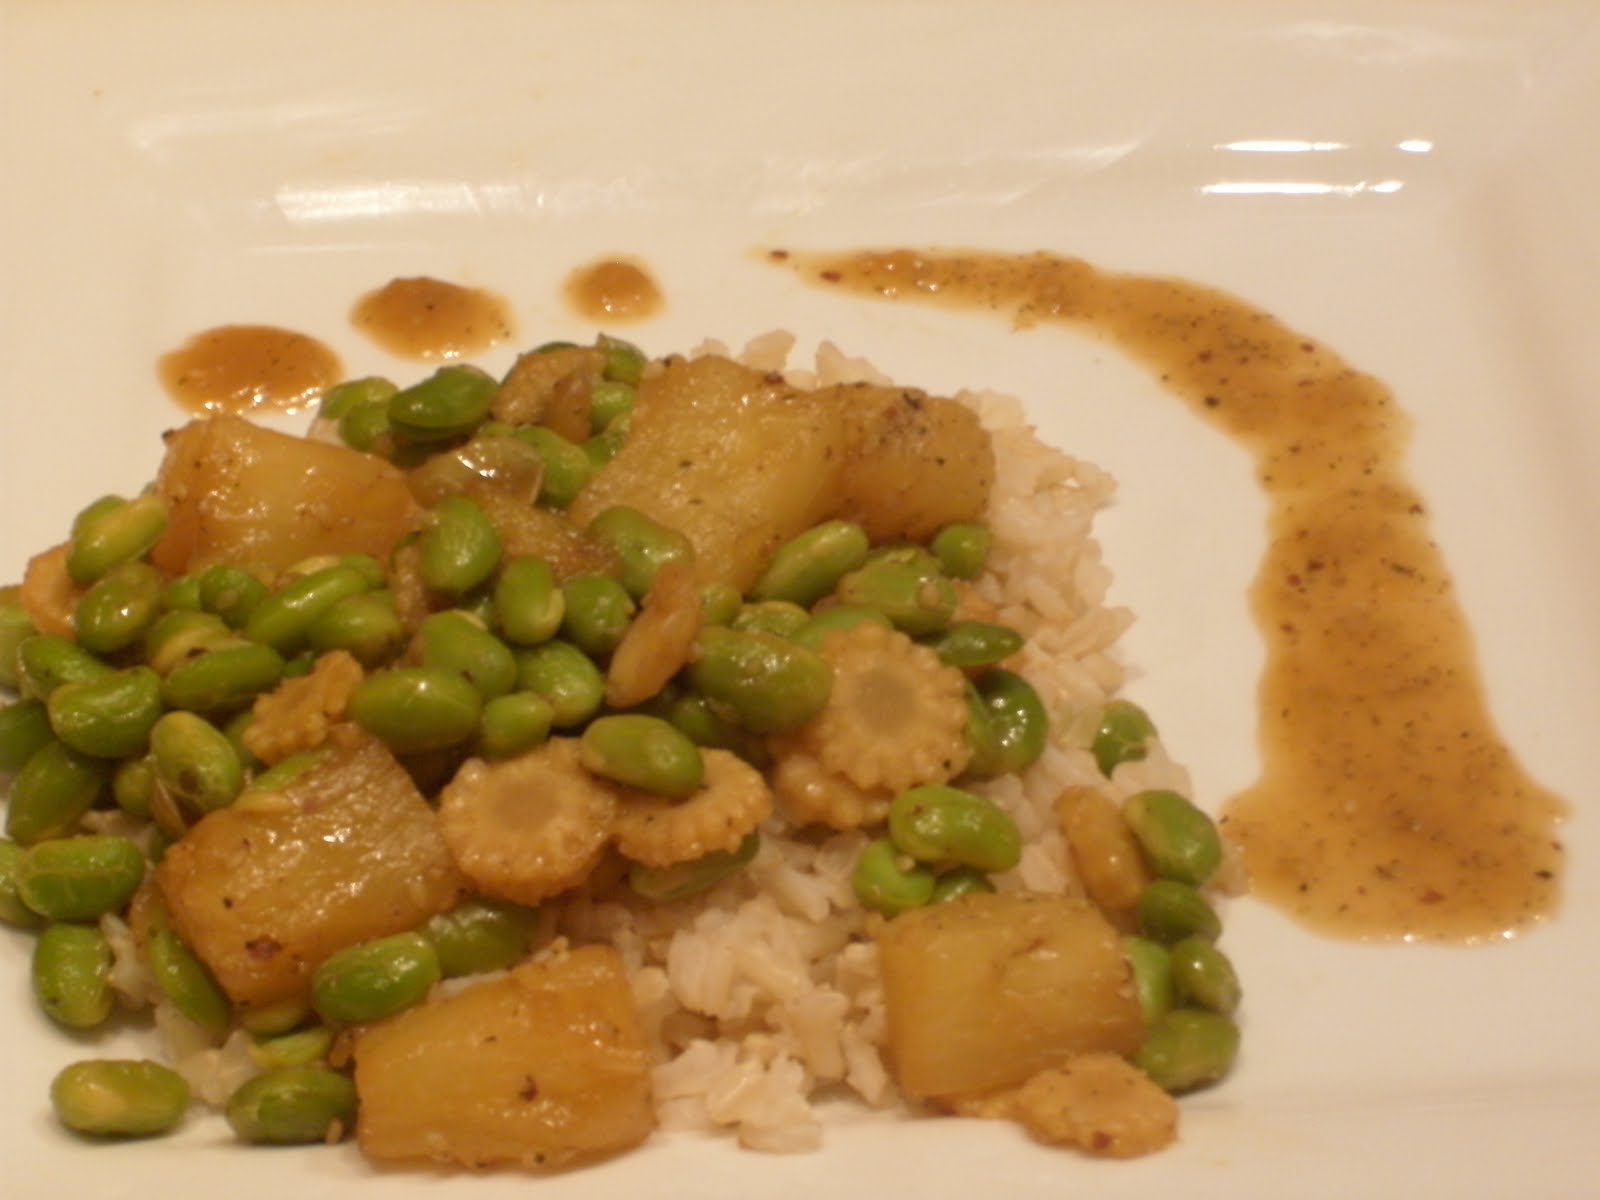
Teriyaki Edemame (Gluten Free)

This is a super simple, sweet, high protein dish that Nikki loves! We serve it over brown rice. The picture looks a little different than the dish usually looks because I was out of toasted sesame seeds, so we used Eden Organic Seaweed Gomasio instead. We also would normally use whole baby corn, it's the only kind I've ever seen in the stores, but a friend gave us a whole case of this sliced baby corn and I love it. They look like cute little yellow flowers!


1 20 oz. can of pineapple chunks in juice
1 Bag (12 oz. more or less) of shelled edemame
1 8 oz. can of baby corn
¼ c San J Teriyaki Sauce (it's gluten free)
1 T Sesame oil
2 T Rice vinegar
2 T Dark brown sugar
1 T Toasted sesame seeds


Bring pineapple juice and chunks to a boil. Boil over med-high heat for about 10 minutes, adding a little water if needed. Add edemame and corn, boil for another 3 minutes. Mix together teriyaki sauce, sesame oil, vinegar, and brown sugar. Pour the mix over the veggies, Stir and boil until thickened into a thin syrup. Remove from heat and toss in the toasted sesame seeds, or just sprinkle them on top. Serve over rice or rice noodles if desired.

Friday, December 18, 2009

Gluten Free GingerBread People with Egg Free Royal Icing

I have decided to take it easy on myself this year. I realized that I just don't have the time or the energy to make a ginger bread house, then I patted myself on the back and said "that's OK". However, I did still want to post my egg-free royal icing recipe, so we decided to make gingerbread people instead. For this I did not even need to create a recipe, I borrowed this wonderful recipe from Janeen at Mom's Food Allergy Diner, which is egg free, dairy free, gluten free, and nut free. I didn't have any Bette Hagman's Gourmet Light Flour Blend so I had to play with the flours a little bit. My final flour blend was:
1 ½ c Sorghum flour
1 c Tapioca starch
1 ½ c Rice flour
½ c Cornstarch
½ c Potato flour
This is a whole cup more flour than the original recipe called for, but it worked well for us. It could be the humidity or the altitude, who knows. After baking the gingerbread people, the girls decorated them with egg-free royal icing. So, here are our little gingerbread people (the ones who haven't been eaten yet) saying "Merry Christmas everyone"!

Friday, December 4, 2009

Egg Free Royal Icing

I have been holding on to this recipe for a year. Actually, I lost it when my hard drive died and was thrilled to see that I had posted it on another site so I was able to get it back. The other site, by the way, is http://hoppobumpo.blogspot.com/2008/12/great-eggless-royal-icing-experiment.html , and has amazingly detailed descriptions of several other egg free royal icing recipes. I made my icing thick. It was strong enough to assemble a gingerbread house and was hard as a rock by the next day. It also tasted good! You can thin it out a little if you want drippy snow-like icing for the roof, but I don't know how long it will take to harden. I wish very much that I had pictures to show, but we don't have any working cameras in the house. If I can get a decent picture with my disposable camera, I will post it later. HAPPY HOLIDAYS!!!

1 c Powdered sugar
1 T Ener-G egg replacer (dry)
1 t Cream of tartar
1/8 t Xanthan gum
2 T Water (approximately)

Blend all dry ingredients together. Add water slowly until desired consistency is reached.

Thursday, November 12, 2009

Broccoli Rissoto

I thought I had already posted this recipe, but I have searched my site and can't find it anywhere. It must have been one I was about to post when I lost my hard drive. I usually make it dairy free for Emily, but here I have added a little cheese at the end to add some protein for Nikki. I just make a full batch, then take half out, and add parmesan to the remaining half. I have been using Wolfgang Puck's Free Range Chicken Broth in a lot of my cooking lately. It tastes wonderful, and I contacted the company and was told that it is free of gluten, dairy, and eggs, (and of course nuts). I can't remember if it has soy and my package is gone so I can't read the ingredients right now, but they assured me that when you read the ingredients there will be none of the top 8 allergens hidden under such titles as "natural flavorings". All major allergens will be stated.

1 c Uncooked arborio rice
2 T Olive oil
2 T Dairy free margarine (for soy free, omit margarine and add 2 more T olive oil)
1/2 c Chopped onion
2 c Chopped broccoli
4 c Chicken broth (one 32 oz box of Wolfgang Puck's Broth)
1/4 c Parmesan cheese (optional)

Saute onion and broccoli in olive oil (and margarine if using) for about 3 minutes. Add rice and stir for another 2 minutes.
Stir in one cup of broth and cook for 5 to 10 minutes, or until broth is absorbed (mine took 8 minutes). Stir while cooking to prevent sticking to the bottom of the pan.
Stir in another cup of broth and continue stirring and cooking for another 5 to 10 minutes, once again until broth is absorbed.
Add another cup of broth and do the same.
Stir in the last cup of broth and continue stirring and cooking until most broth is absorbed and rice is soft with a creamy texture.
Add salt and pepper to taste and at this point add parmesan cheese if desired (If cheese is used this will of course contain dairy). For a "cheesy" taste without the dairy you can also add a T of nutritional yeast which is also fairly high in protein and B vitamins. Enjoy!

Thursday, July 9, 2009

Broccoli Salad

I had a hard time naming this one, and yes, my creative conclusion was
"broccoli salad". The flavor is a lot like cole slaw, but it also has a slightly Asian feel due to the sesame seeds. By the way, I didn't use plain sesame seeds in mine, I used Eden Organic's Seaweed Gomasio because that's what I had laying around. Also, I haven't tried this, but I'm thinking that you could avoid the soy by leaving out the Vegenaise and it would have a more genuine Asian flair...but you may need a little more liquid of some sort.

½ c. Vegenaise
¼ c. Agave nectar
¼ c. Rice vinegar
2 T. Toasted sesame seeds
½ t. Celery seeds
½ c. Dried cranberries
1 Bag of Mann's Broccoli Slaw
1 Head of broccoli
Salt and pepper to taste

Chop up the head of broccoli and put it in a bowl with the broccoli slaw and the dried cranberries. Mix the Veganaise, agave nectar, rice vinegar, sesame seeds, and celery seeds. Pour it into the bowl of veggies and stir well. Add a little salt and pepper. Chill for an hour or so to let the flavors combine. WOW, that was easy (and yummy too)!

Thursday, June 11, 2009

Egg-Free Potato Salad On A Rainy Spring Day

I have always considered this to be a "German style" potato salad, but after doing a little research I found that theirs almost always has bacon in it. I may be trying that version next since Emily loves bacon. This salad, however, was created for Nikki, my vegetarian. As you can see it is a beatiful day for eating outside. Everything is green and smells of fresh rain. I picked some chives from my garden and sprinkled them on top of my salad (since the girls don't allow onion IN the salad). Chopped red onion would be really, really good in it too... personally, I love onions!!! OK, enough about onions, here's to spring and the beginning of salad season!

6 Medium sized red potatoes
½ c Chopped Kosher dill pickles
½ c Chopped celery
½ c Sliced black olives
¼ c Dill pickle juice
2 T Reserved black olive juice
2 T Rice vinegar (or any preferred vinegar)
1 t Dried dill weed
½ t onion powder
½ t Salt
A couple of grinds of black pepper
 
Bring 1” of salted water to a boil. Add whole potatoes and bring back to a boil. Cover the pot and reduce heat to medium. Boil for 20 to 30 minutes depending on the size of the potatoes. You want them to have a little resistance when pierced with a sharp knife, but you don’t want them to feel “crunchy” in the middle. Remove potatoes from heat, drain them, rinse in cold water, and drain again. Put them in the fridge to cool.
While the potatoes are cooling, chop up the pickles, celery, and olives. Take out the potatoes and chop them into bite size pieces. Put them into a medium bowl. Add the pickles, celery, and olives, and all of the remaining ingredients on top. Stir everything together with a sort of “folding” motion. It can take a little while to get everything incorporated without mashing the potatoes. A little mashing is good, however, it gives the potato salad a hint of creaminess.

Tuesday, June 2, 2009

Chocolate Dipped Strawberries-Allergen Free (unless, of course, you are allergic to strawberries...or chocolate)

I am not a candy maker by any stretch of the imagination, and yes, I've seen prettier, but I'm still darned impressed with myself right now. :)

Several weeks ago my amazing daughter Amanda had to take a HUGE advanced placement European History test, you know, the kind where they search you and take all of your belongings as you enter the room. She was not even allowed to have a water bottle, and had to be "escorted" to the restroom. It was a scary test! I thought she deserved a reward when it was all over so I bought her some chocolate dipped strawberries. She shared them with everyone...except Emily who couldn't have them. I said "I can make some for you, it should be pretty easy". Well, the funny thing is that making them WAS easy, finding the time to make them wasn't. Three different times I bought a basket of beautiful strawberries, came home and put them in the fridge, and by the time I had a day off to make them they were not pretty anymore. Well here they are Emily, finally, I'm sorry it took three weeks to make them!

6 Beautiful strawberries

1 c Allergen free chocolate chips (I usually use Enjoy Life brand, but I just discovered FMV brand-super cheap- at Fred Meyer...so cheap I guess they couldn't afford to put milk in them...YAY! FMV does have soy lecithin, Enjoy Life does not have any soy)

2 t Spectrum brand Palm shortening

1/2 c Allergen free white chocolate chips

1 t Spectrum brand palm shortening

Put your chocolate chips in a tall narrow plastic cup with the 2 teaspoons of shortening and melt in the microwave on medium setting, stirring about every 30 seconds. I would be more specific but every microwave is different. Mine actually has a "melt chocolate" setting. You can, of course, do this the traditional way with a double boiler, but I like to keep things simple. Also, having your chocolate in a narrow and tall glass makes dipping simple and minimizes waste. Cover a plate with parchment or waxed paper. Grab a strawberry by the top and dip about 3/4 of the way into the chocolate. Lay it with the prettiest side up on the plate. Continue until you are out of chocolate or out of strawberries. Place in the fridge until chocolate is hard.

The white chocolate drizzle is optional and I actually found it to be a little trickier than I expected. Add the other 1 teaspoon of shortening to the white chocolate chips and, again, melt in whatever way you are most comfortable with. Allow to cool slightly (that's the part I had trouble with). Transfer into a plastic sandwich bag. Snip a tiny corner off of the bag and use it to "pipe" the white chocolate drizzle over the top of the strawberries. Enjoy!


A little side note here... I made this recipe soy free with my niece's beautiful baby girl Sophie in mind. Sophie is allergic to almost everything Emily is plus soy. I know that a lot of my readers are allergic to soy and so I do tag all of my recipes that are soy free. If you go to my "labels" on the right side of this blog and click on "soy free" the recipes that come up should all be free of gluten, dairy, eggs, peanuts, beef, and soy.

Wednesday, April 29, 2009

Chicken "Stroganoff"

Were I to make this again for Emily I would leave out the onions, the mushrooms, and the fake sour cream, HOWEVER... in my opinion this recipe is better! I guess it's designed more for adult tastes. I can't blame her, when I was a kid I couldn't stand onions or mushrooms either. So last night, after I took this picture, we spent 5 minutes picking out all the onions and mushrooms before she would eat it. As for the fake sour cream, I didn't even put it in. I just know that it would have had more of a richness if I had. I guess what I'm saying is that here we have two recipes in one. For a basic chicken in cream sauce (which was still delicious, don't get me wrong) leave out the onions, mushrooms, and fake sour cream...For a dish that is more like a true stroganoff follow the recipe below.


3 or 4 Boneless skinless chicken breasts cut into 1/2" strips
8 oz Sliced crimini mushrooms
1 Yellow onion cut into strips
1/4 c Dairy free margarine
3 T Sweet rice flour
2 c Chicken broth, warmed
2 t Chicken bullion safe for your allergies (1 cube of Harvest Sun brand)
1/4 c Dairy free sour cream alternative (like Tofutti http://www.tofutti.com/ss.shtml)
Cooked gluten free noodles


Melt about 1 tablespoon of margarine in a large frying pan over medium-high heat . Sautee chicken strips for about 10 minutes or until chicken is cooked through. Add mushrooms and onions and cook while stirring for another 5 minutes. Set aside.

Dissolve bullion in warm chicken broth.

Melt 1/4 cup of margarine in a heavy saucepan over medium heat. Sprinkle in sweet rice flour and whisk until creamy. Slowly pour in about 1/4 of the broth while whisking until fully blended. Continue adding about 1/4 of the broth at a time, whisking until creamy after each addition. boil and whisk for about 1 minute. Mix in the sour cream substitute.

Add the chicken, mushroom, and onion mixture to the sauce. Stir well and simmer until heated through, about 5 to 10 minutes.

Serve over noodles (or rice) if desired. I was trying to go for an egg noodle effect, so I used broken up Tinyada lasagne noodles.

Thursday, April 23, 2009

Sloppy Turkey

I couldn't resist the title. One of the first allergen free cookbooks I ever owned had a section on eating extremely alternative foods, and one of the recipes in it was called "sloppy goat". Every time I think of it I truly laugh out loud. I get a mental picture of a very messy goat eating lunch! I have yet to find anyone who thinks it is as amusing as I do (sigh).

I have been too busy to cook lately, much less post recipes, so my next few "recipes" may be very simple, not to mention few and far between. There's nothing wrong with quick and simple dinner ideas either though, right?

I made this specifically for Emily, so it is a sweet and kid friendly version. If you prefer you can make it even easier and just use "Manwich". I read the label and the only allergen I saw was soy, but I didn't call the company so I can't make any guarantees. Emily won't eat "Manwich" because she doesn't like "things" in her sauce (bell peppers, onions, and such). This version is sweet and spicy, yummy and messy, as you can see in the picture...although she does seem to be licking her fingers rather daintily. :)


1/2 c Safe barbecue sauce
1/2 c Ketchup
1/4 c Water
1 1/4 lbs Ground Turkey
Allergen free hamburger buns http://yummyallergenfree.blogspot.com/2009/04/hamburger-buns.html

Crumble and brown the ground turkey in a large frying pan. Mix the barbecue sauce, ketchup and water together. Add the sauce to the turkey and simmer long enough to reduce and thicken to the desired consistency, about 15 to 20 minutes. Serve on fresh baked or reheated buns. If you have leftovers you can freeze the sloppy joe mix as well as the buns, then when you need a REALLY quick and simple meal...there it is!

Monday, April 6, 2009

Hamburger Buns

These are obviously not as soft and fluffy as the cheap white buns you get at the store, but they are comparable to whole wheat buns. These buns are best if used the same day they are made. If you have leftovers freeze them immediately, then when you are ready, microwave them for a bit and they soften right up. If you like your buns toasted, that will work great too.

1 Bag of Pamela's Wheat Free Bread mix
2 Eggs worth of prepared Ener-G egg replacer
1/4 c Oil
1 1/3 c Warm water

Pour the warm water, oil, and prepared egg replacer into a mixing bowl. My own special way of knowing if the water temperature is right...I stick my finger in it, the water should feel like my daughters head when she has a low grade fever (I know, I'm an odd duck). Add the baking mix, then the enclosed yeast packet on top of that. Mix on low speed for 30 seconds, then on medium-high for 2 minutes.
Cover a baking sheet with parchment paper. Put the dough out in half cup blobs. I used a large spring action ice cream scoop. You should have about 6 or 7 buns. Wet your hands with warm water (or you can coat your hands with oil) and pat down the blobs, shaping them if needed, until they are round and about 1" tall. Re-wet/oil your hands before doing each one.
Put the buns in a warm place to rise for about an hour or until doubled in height.
Preheat oven to 350 degrees. Bake for 30 minutes or until tops are golden and buns sound hollow when you thump them. Cool completely, then slice across the middle with a sharp serrated edge knife.
These are perfect for burgers, but they're awesome when used for deli style sandwiches too!
Enjoy :)
P.S. Don't forget that you can buy Pamela's bread mix by the case (6 bags) through my Amazon link which is to the right. I go through about 2 bags a week and I find that it is much cheaper to buy through Amazon. The trick is to order an inexpensive book, or something else you have been needing or wanting, along with it so that you get free shipping. ;)

Monday, March 30, 2009

Egg, Dairy, and Gluten Free French Toast

This is one of the recipes I lost when my hard drive died, but I think I've got it pretty close to the original. My pictures may be blurry and amateur for a while, my oldest daughter lost her camera and I am taking my own pictures again. This recipe does not need to be gluten free. You can use any kind of bread, although a sturdy bread works best. I will first post the recipe for flax egg replacer because it can also be used in other recipes. It is good for binding and moisture retention, but does not help with rising.

Flax Egg Replacer:

Bring 1/2 c of water and 1 T of flax seed to a boil. Reduce heat and simmer for 5 minutes. There are a few ways to do this. If you don't mind the seeds you can use whole seeds and just leave them in. If you don't want the seeds in you can strain them out, but it is a little bit of work. I opted for the third choice which is to grind the seeds first and leave them in so they are just not as noticeable.

French Toast:

1/2 c Water and 1 T Flax seed as prepared above
2 Eggs worth of prepared Ener-G egg replacer
1/4 c Soy milk
1/2 t Vanilla extract
1 t Cinnamon
About 3 slices of bread-We use Pamela's Wheat Free Bread Mix bread

Preheat a well oiled frying pan to medium-high.
Whisk soy milk and Ener-G egg replacer into flax seed egg replacer. Mix in the vanilla and cinnamon.
You are now looking at a pretty thick goo. Instead of simply dipping your bread in the mixture like you normally would this will require more of a spreading action. I laid my bread into the mixture and flipped it over, then used my hands to spread it around and sort of massage it in. Yes, this is messy, but if your in the right mood it's kind of fun. Wipe off any excess glops.
Place in the frying pan and cook for approximately 3 minutes on each side. If your toast is browning too quickly turn the heat down. Oil pan before each new piece.
This only makes 2 or 3 pieces, so if you are making more simply double the recipe.

Sunday, March 22, 2009

Allergen Free In-A-Pinch Pancakes

Ughhh! I ran out of my
"Cravings Place" pancake mix, and here it is Sunday morning...
we have to have pancakes! This is the recipe I threw together. It's possible that it could be improved upon, but for now Emily is plenty pleased with this recipe.
I do apologize for the lack of recipes here lately. Somehow, when I lost all of my recipe files on my computer (even though I have most of them here too) it felt like I lost a little piece of me, and a little confidence too. It is a very difficult feeling to describe, but I feel almost like I have forgotten how to bake allergen free.
At any rate, I'm ready to start again. Here is our pancake recipe. Next I am going to try to remember my french toast recipe...I can do this. Right?

1/4 c Tapioca starch
1/4 c Potato starch
1 c Rice flour
1/2 c Sorghum flour
4 t Baking powder
2 T Granulated sugar
1 1/2 c Water
2 t Vinegar
2 t Vanilla extract
2 T Oil (safe for your allergies)
2 T Applesauce

Preheat griddle to medium-high heat.
Combine all of the dry ingredients and sift or whisk together until well blended.
In a separate container whisk together all of the wet ingredients (everything remaining).
Add the wet ingredients to the dry ingredients and stir until fully combined and smooth.
Oil your griddle with margarine or oil safe for your allergies. Pour slightly less than 1/4 cup of batter onto griddle and cook for a couple of minutes. It's time to flip when: bubbles stay open after they pop, edges look dry, and you can see a slight golden color on the bottom of the edges where they meet the griddle. Flip pancakes and cook for another minute or two. Adjust heat if necessary. My griddle usually gets hotter the longer it is on, so I start out at medium-high, and by the last pancake I am at medium.
I served these with very naughty nitrate filled bacon, it's just sooo yummy.
Thank you all for sticking with me through my recent struggles, hopefully I will get back in the swing of things soon!

Monday, February 9, 2009

Scalloped Potatoes- GF/DF

The simple solution to "cheesy" scalloped potatoes would have been to melt Emily's fake cheese and pour it all over them. The problem with that, as I'm sure I've mentioned before, is that Emily's fake cheese doesn't smell very good. As a matter of fact, her sisters insist that the smell of it makes them sick to their stomachs. Well, the last thing I need is for the people Emily admires most to be telling her how "disgusting" her food is! Because nutritional yeast has been described as having a cheesy/nutty flavor I thought I would give it a try. I tasted these myself (even though I am a gluten and dairy eater) and I thought they were quite delicious, and best of all they smelled good too!

4 to 6 Medium sized red skin potatoes
4 T Dairy free margarine
3 T Sweet rice flour
1 ½ c Warm chicken broth
½ c Soy milk (or other milk alternative, another 1/2 c. chicken broth works fine also)
1/8 t curry powder (optional)
1 t Onion powder
2 T Nutritional yeast
½ t Salt
Pepper to taste

Grease a medium casserole dish. Preheat oven to 400 degrees.

Slice the potatoes into ¼” slices and put them into the casserole dish. Set aside.

In a medium saucepan melt the 4 T of margarine over medium heat. Sprinkle in the sweet rice flour. Stir and cook for one minute. Add about ¼ of the warm broth and stir until smooth. Continue to add broth, a little at a time, stirring until smooth after each addition. Add the Milk substitute and again stir until smooth. Stir in curry powder, onion powder, nutritional yeast, salt, and pepper. Bring to a boil. Boil for one minute while stirring.

Pour the sauce over the potatoes and toss until potatoes are all coated.

Bake for 45 minutes, or until potatoes are tender.

Tuesday, January 27, 2009

Gluten Free, Dairy Free Chicken Cordon Bleu

I know that Chicken Cordon Bleu is supposed to be oozing with cheese. I thought about replacing it with fake cheese, but there really aren't any good swiss cheese substitutes. Honestly, if you get a nice flavorful ham, you won't even miss the cheese. Sorry about the shadows in the picture, I had to take it myself. I've learned a lot from amanda, but I don't think I will ever be the photographer that she is. :)

4 Boneless skinless chicken breasts
Thinly sliced ham, enough to fill chicken
1 Stick of dairy free margarine, melted
about 1 c of Gluten free bread crumbs

Grease a baking dish. Preheat oven to 375 degrees.

There are two ways to go about preparing your chicken. My favorite way is to place a chicken breast in a gallon size ziplock bag and pound it until it is about ¼” thick, then roll it up. The other way is easier, simply slice your chicken breast across the middle and open it like a sandwich. Sprinkle the chicken with a little salt and pepper. Place the ham inside. If you are rolling it then do so now and secure with a toothpick, otherwise just close your “sandwich”. Dip it in the melted margarine, making sure that every bit is covered, then fully coat with breadcrumbs. Place in baking dish. Repeat with each piece of chicken. Sprinkle any remaining breadcrumbs over the top and drizzle any remaining margarine over that.

Bake for approximately one hour, or until chicken is fully cooked.
P.S. Don't forget to take out the toothpicks!!! (oops)

Tuesday, January 20, 2009

Turkey Meatballs and Spaghetti

I linked back to my breadcrumb recipe, I feel like a pro! :)
My husband's family is Italian, so I've been making meatballs since before Emily was born. The original recipe calls for beef and lots of garlic, both of which Emily can not have. If you make these and you are able to have garlic then add a little garlic powder to the meatballs themselves, and a couple of cloves of crushed garlic to the sauce. Also, these are best when simmered in the sauce for a couple of hours, but if you only use a few at a time (like we do) then freeze the meatballs without the sauce so they will be easier to portion out later.

Meatballs
1 ¼ lbs Ground turkey
½ t Salt
¼ t Black pepper
½ t Onion powder
¼ c Gluten free bread crumbs

Mix well. Roll into walnut sized balls. Bake at 350 degrees for 30 minutes.

Pour a jar of allergen free marinara sauce into a large pot. I'm on a pretty tight budget right now so I used Hunt's canned sauce. I've never used canned sauce before but it was actually pretty good. If you are using garlic then crush a couple of cloves into the sauce now. Add the meatballs and stir them in. Simmer on low heat for about 2 hours, stirring occasionally to make sure it doesn't burn or stick to the bottom. Serve over your favorite pasta. We use Tinkyada rice pasta.